SSO With VMware Workspace ONE
Last modified on March 27, 2025
On this page
This document details the steps to set up VMware Workspace ONE single sign-on (SSO) to manage authentication for StrongDM.
Steps
- In Workspace ONE, click Catalog and then click New to create a new SSO application with an OpenID Connect authentication type.
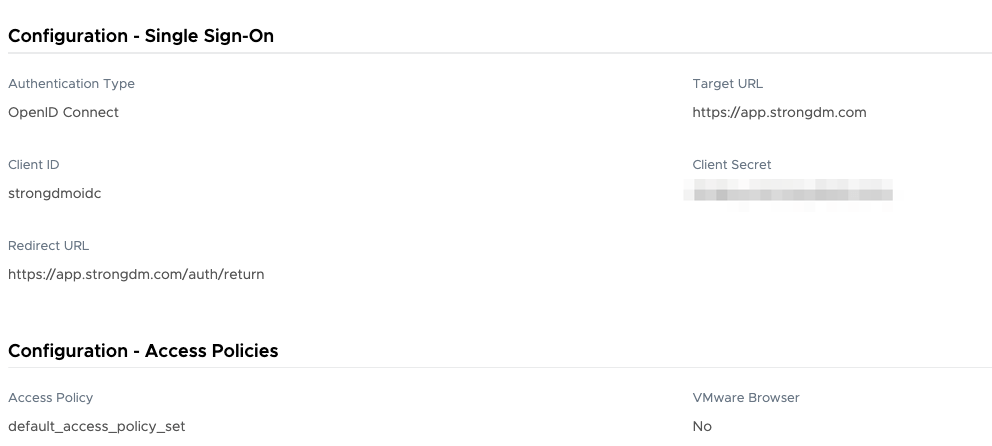
- On the Settings tab, configure the application by entering the following information (do not use a trailing slash for the URLs):
- Authentication Type: Select OpenID Connect.
- Client ID: Enter strongdmoidc or any other string value.
- Redirect URL: Set the appropriate URL based on your tenant location.
Follow instructions in the tab for your organization's StrongDM region, not your location.
- Target URL: Set the appropriate URL based on your tenant location.
Follow instructions in the tab for your organization's StrongDM region, not your location.

Configure Application
- Click Save to create the app. Copy the Client ID and Client Secret values. You will need these values in the next step.
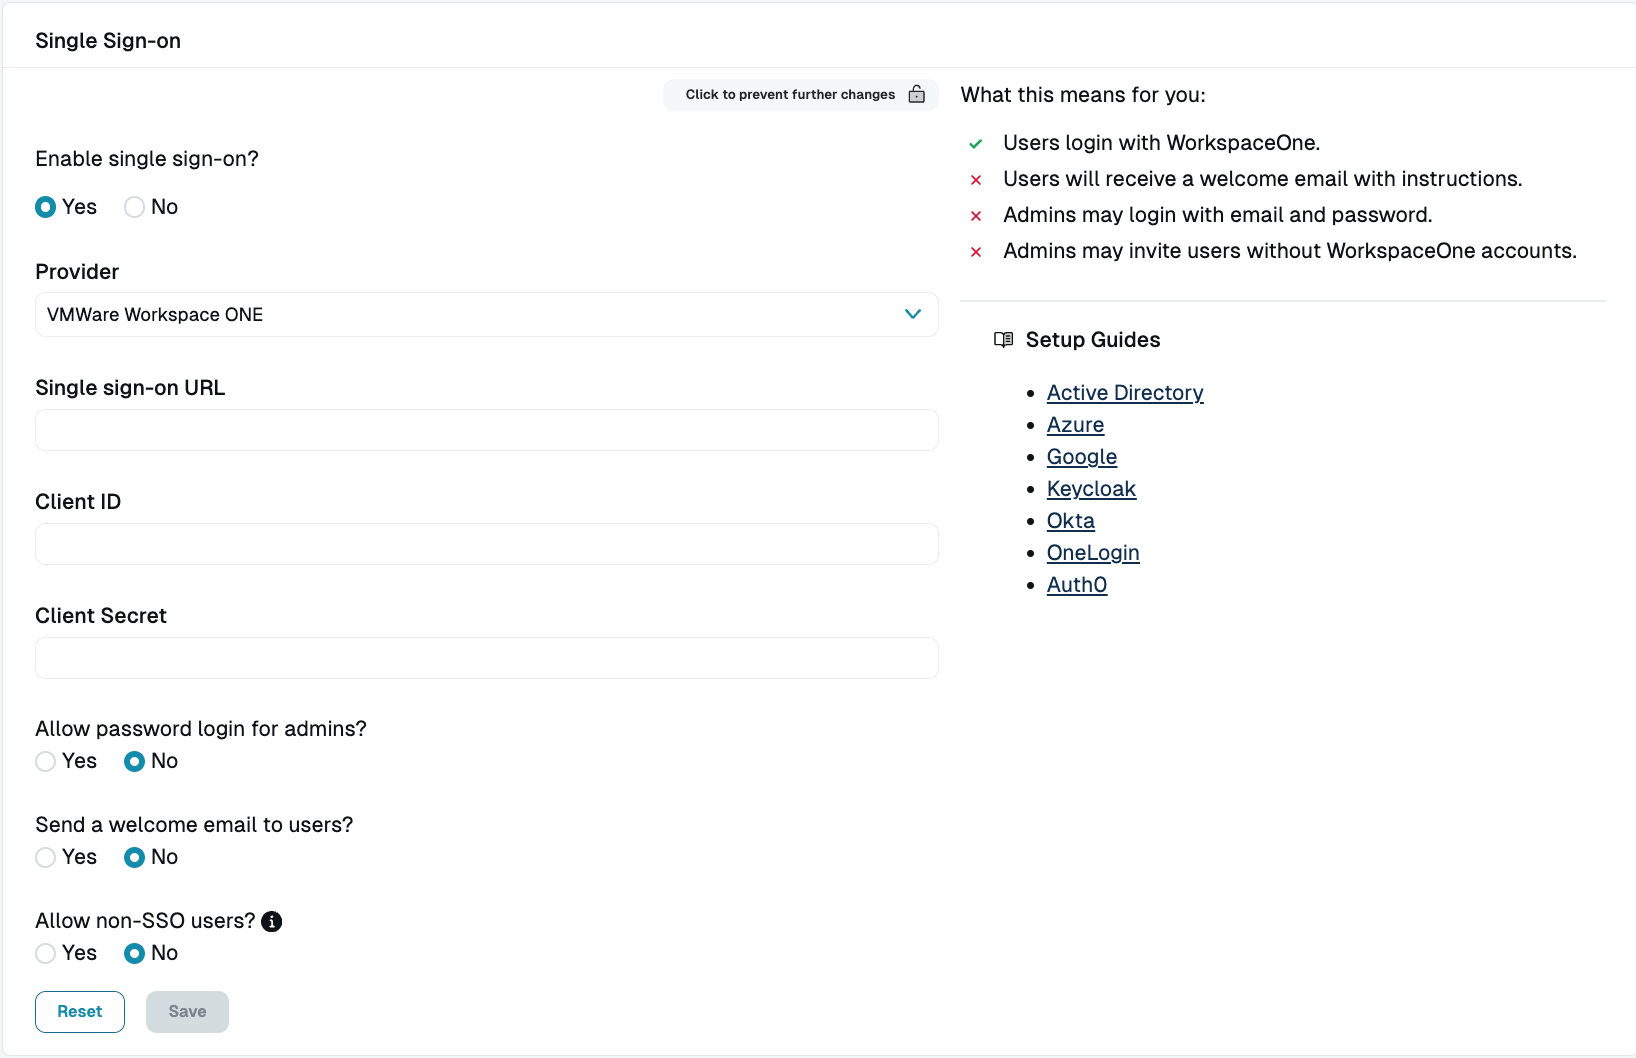
- Next, enter the account details in the StrongDM Admin UI. Go to Settings > User Management. In the Single Sign-on section, set the following:
- Provider: Select VMWare Workspace ONE.
- Single sign-on URL: Add your URL (
https://<YOUR-ORG>.workspaceoneaccess.com/SAAS/auth). Do not include a trailing slash for the URL. - Client ID: Paste your client ID.
- Client Secret: Paste your client secret.
- Select your desired general SSO settings and click activate.

Configure Workspace ONE SSO in StrongDM - Confirm user access by doing the following:
- In Workspace One, make sure your users are entitled to the app you just created.
- In StrongDM, make sure you have created users whose email addresses match those in VMware exactly.
- In StrongDM, assign a Role to your test user that will grant access to one or more resources.
- Install the StrongDM Client, and try logging in with a VMware account.
If your test is successful, you should be ready to roll out SSO to your teams.