One of the most common and straightforward ways to list all groups in Linux systems is by leveraging the Linux "list groups" command. However, this isn’t the only way. There are several alternative methods, such as the "getent" command, the "/etc/group" file, and the "id" command.
This guide will explore these methods in detail, so read on to get the full scoop.
Understanding Linux Groups and User Permissions
As a multi-user operating system, Linux lets multiple users access it simultaneously. It does so by utilizing a concept known as groups. Groups in Linux are a collection of users who share the same access rights and permissions. They allow administrators to organize users and assign different privileges to them.
These groups are generally categorized into two main types — primary and secondary. Every user belongs to at least one primary group. Users can also belong to several secondary groups, but this will depend on their permissions.
Linux groups are important for several reasons, including:
- Simplified user management: Groups allow you to group users with similar roles so you can collectively apply permissions to them.
- Enhanced collaboration: Shared projects become easy to collaborate on because multiple users can work with the same resources without compromising security or access control.
- Secure resource access: Groups let you control who can access system resources, such as files and directories, by letting you assign permissions at the group level.
What Is the Groups Command in Linux?
The Linux "list groups" command lets you view user groups and create new ones. It also lets you add and delete users from these groups. This tool helps you (the administrator) verify access rights and ensure proper permission structures.
Essential Methods to List Groups in Linux
Apart from the "list groups" command, Linux has several built-in tools and methods that can help you manage groups. These include the following.
Using the '/etc/group' File to View Users
Linux systems store group information in the "/etc/group" file. Every line in this file contains group details, such as the group name, a password placeholder (usually "x"), the group ID (GID), and a list of users in that group. Worth noting is that the password field (usually "x") is almost always unused and deprecated. Modern systems use "/etc/gshadow" for secure group passwords (if used at all).
To view the contents of the "/etc/group" file, use the command shown below:
cat /etc/group
The output for this command will generally follow this format:
[group_name]:[x]:[group_ID]:[user1], [user2], [user3]...
If you want better readability, the "less" command can be helpful:
less /etc/group
Using the 'getent' Command for Group Display
Another alternative to the Linux "list groups" command is the "getent" command. Short for “get entries,” "getent" lets you view the contents of system databases configured in "/etc/nsswitch.conf." This includes the "/etc/group," "/etc/passwd," and "/etc/shadow" files. It also retrieves information from network sources such as LDAP or NIS, depending on your system configuration.
To list all groups using this command, simply type:
getent group
The output for this command will slightly differ from that of the "cat /etc/group" command because it also pulls group information from external directories or authentication services.
If you want to display only information for a specific group, use:
getent group groupname
Checking Group Membership With the 'id' Command
While typically used to fetch a user’s ID, you can also use the "id" command to determine which groups a user belongs to. To do so, use:
id [username]
This will display the user ID (UID), the primary GID, and all supplementary groups the user is a member of. Below is an example to illustrate this:
uid=1001(fred) gid=1001(fred) groups=1001(fred),27(sudo),1002(dev)
The above output shows that the user "fred" belongs to the primary group “fred” and the secondary groups “sudo” and “dev.”
How to List Members of Specific Groups
In some cases, you may need to know which users belong to a particular group, instead of which groups a certain user belongs to. Here are several ways you can go about it.
Show Members Using Command-Line Tools
Command-line tools like "getent," "awk," and "grep" can help you list members in a specific group.
Using the "getent" command, simply type:
getent group [groupname]
This will show you the group and its members in the format below:
[group_name]:[x]:[GID]:[user1],[user2]...
This shows a single line with group details, but it’s not formatted for easy parsing in scripts. You can leverage "awk -F: '{print $4}'" to cleanly extract members, as shown below:
getent group groupname | awk -F: '{print $4}'
The command above isolates the line for the specified group (groupname) and prints only the fourth field, which contains the usernames.
Display User Group Membership
You can also list all of the groups that a specific user belongs to. To do so, simply use the following command:
id [username]
This will give you complete group membership info, including the primary group.
If you want a quick view of supplementary groups, you can use:
groups [username]
Find User Permissions and Access
Groups should generally tell you the level of access a user has to system resources. However, to understand permissions in context, you can examine file permissions using the "ls -l" command:
ls -l [filename]
You’ll see output similar to this:
-rwxr-xr-- 1 alice developers 4096 Apr 14 09:00 example.sh
In this example, the user (alice) has full access (rwx), and the group (developers) can read and execute (r-x). Others can only read (r--).
Advanced Group Management Techniques
Beyond listing groups in Linux, there are several other actions you can do to manage them. Let’s explore some of them.
Managing System Group IDs
Each group in the Linux system has a unique GID. User-defined groups typically have GIDs that are higher than 1,000. On the other hand, system groups’ GIDs are generally below 1,000.
To view GIDs, you can use:
getent group | sort -t: -k3 -n
This command will list all of the groups in your system and then sort them by GID in numerical order.
It’s important to be aware of potential complications, especially in environments using LDAP or other directory services. These systems may pull in remote group entries, which can blur the distinction between local system and user groups.
Therefore, if you want to clearly distinguish system vs. user groups (and skip LDAP or remote entries), you can filter locally with something like:
getent group | awk -F: '$3 < 1000' | sort -t: -k3 –n
This lists only groups with GIDs less than 1,000 (typically system groups)
You can also change a group’s GID by using the command below:
groupmod -g NEW_GID groupname
Note: Changing a group’s GID may break file ownership. Instead, it's best to locate and fix affected files using:
find / -group OLD_GID
Group Membership in Ubuntu and Debian
Group membership management in Debian-based systems like Ubuntu is similar. However, the process for creating a group and membership defaults may vary slightly.
For instance, Debian systems often include default groups like sudo for users with administrative privileges. Additionally, Ubuntu assigns each user a unique group with the same name as the username by default, which can be confusing for administrators who are new to Debian-based systems.
If you wish to add a user to a group in Ubuntu, you can use:
sudo usermod -aG groupname username
Group Security Best Practices
Since some groups may have access to sensitive files and data, you must always ensure that you observe security best practices. This is because malicious actors can target these groups to gain access to and steal this data.
Setting Proper Group Permissions
You must be extremely careful with the access rights and permissions you give to a group. Overly permissive configurations can make a group a target for hackers. Even worse, if the attackers were to gain access to a group with these kinds of privileges, they could compromise the entire system’s integrity, escalate their privileges, or exfiltrate sensitive data.
Therefore, it’s best to implement the principle of least privilege. This means that you give a group only the necessary level of access required for users to perform their roles.
To set precise permissions, you can leverage commands such as:
- chmod: This command defines read, write, and execute permissions for the owner and group.
- chgrp: This command changes the group ownership of a file or directory.
- setfacl: This allows for more granular, per-user, or per-group permission settings. For instance, "setfacl -m g:dev:rw /var/log/ app.log" lets you grant read/write access to the group "dev" on a specific log file.
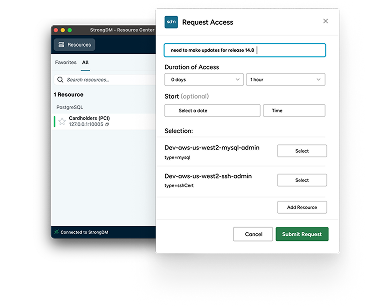
How StrongDM Simplifies Linux Group Management
Leveraging tools like the Linux "list groups" command is an effective way of managing groups. However, most of the methods we’ve discussed in this article can be overwhelming and time-consuming because they require manual intervention. With tools like StrongDM, you can make managing Linux groups less cumbersome.
Our solution provides:
- Operational efficiency: StrongDM eliminates the need for local manual group provisioning and lets you automate your group management by streamlining access permission management. This helps reduce the administrative burden on your team and increases your productivity.
- Complete visibility: With StrongDM, you get a bird’s-eye view of your entire system from one dashboard, so you can see who has access to what and how they access it.
- Centralized user management: Our solution lets you provide just-in-time access for your project. You can grant and withdraw permissions as needed, all automatically.
- Audit logging: You’re always in the know in case of group membership changes.
- Centralized control: StrongDM seamlessly integrates with IAM systems like Okta and Azure AD.
Want to see StrongDM in action? Book a demo today.
Additional Resources